Set up SAML SSO with Okta
Configure Okta as your GraphOS organization's identity provider
Single sign-on (SSO) is available only for Dedicated and Enterprise plans. This feature is not available as part of an Enterprise trial.
This guide walks through configuring Okta as your GraphOS organization's identity provider (IdP) for SAML-based SSO. Once you've set up your integration, you need to assign users to it in Okta so they can access GraphOS Studio via SSO.
💡 TIP
If your organization's SSO was set up before April 2024 according to the legacy instructions, Apollo highly recommends creating a new SSO configuration with the updated instructions.
Setup
These are the latest instructions (as of April 2024) for setting up SSO for a GraphOS Studio organization. This new SSO setup is currently in preview.
Though in preview, Apollo recommends using the new setup unless your organization has a strong reason not to. If you have questions, please consult with your Apollo contact.
SAML-based SSO setup has two main steps:
- Create a custom Okta app integration for Apollo GraphOS.
- Send your Okta app integration's SAML metadata to Apollo.
Setup requires an Okta account with administrator privileges.
Step 1. Create a custom app integration
ⓘ NOTE
To use the latest version of Apollo's SSO, ensure you are creating a custom app integration in Okta rather than using the GraphOS app in the Okta Application Network.
Send a request to your Apollo contact for Apollo's service provider (SP) SAML information. Include the organization name(s) you are setting SSO up for.
Your Apollo contact will respond with a URL where you can download Apollo's SP SAML XML metadata file(s) for your organization(s). This file contains the following values:
- Single Sign-on URL
- Entity ID
ⓘ NOTE
SSO metadata values differ for each GraphOS organization. If setting up SSO for multiple organizations, repeat the following steps for each organization using different values.
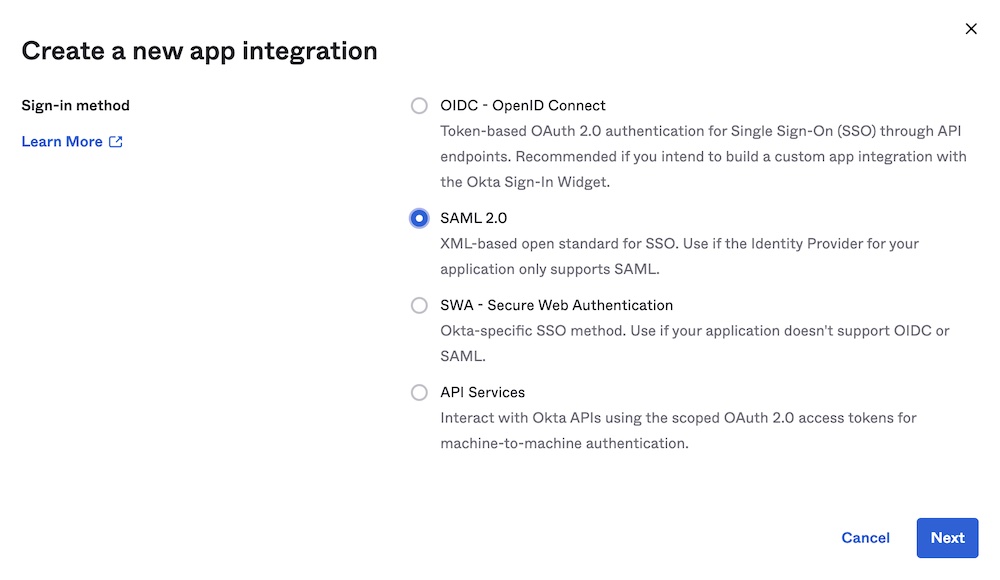
From your Okta Administrator Dashboard, go to the Applications view. Click Create App Integration.
In the dialog that appears, select SAML 2.0 as your sign-in method. Click Next.
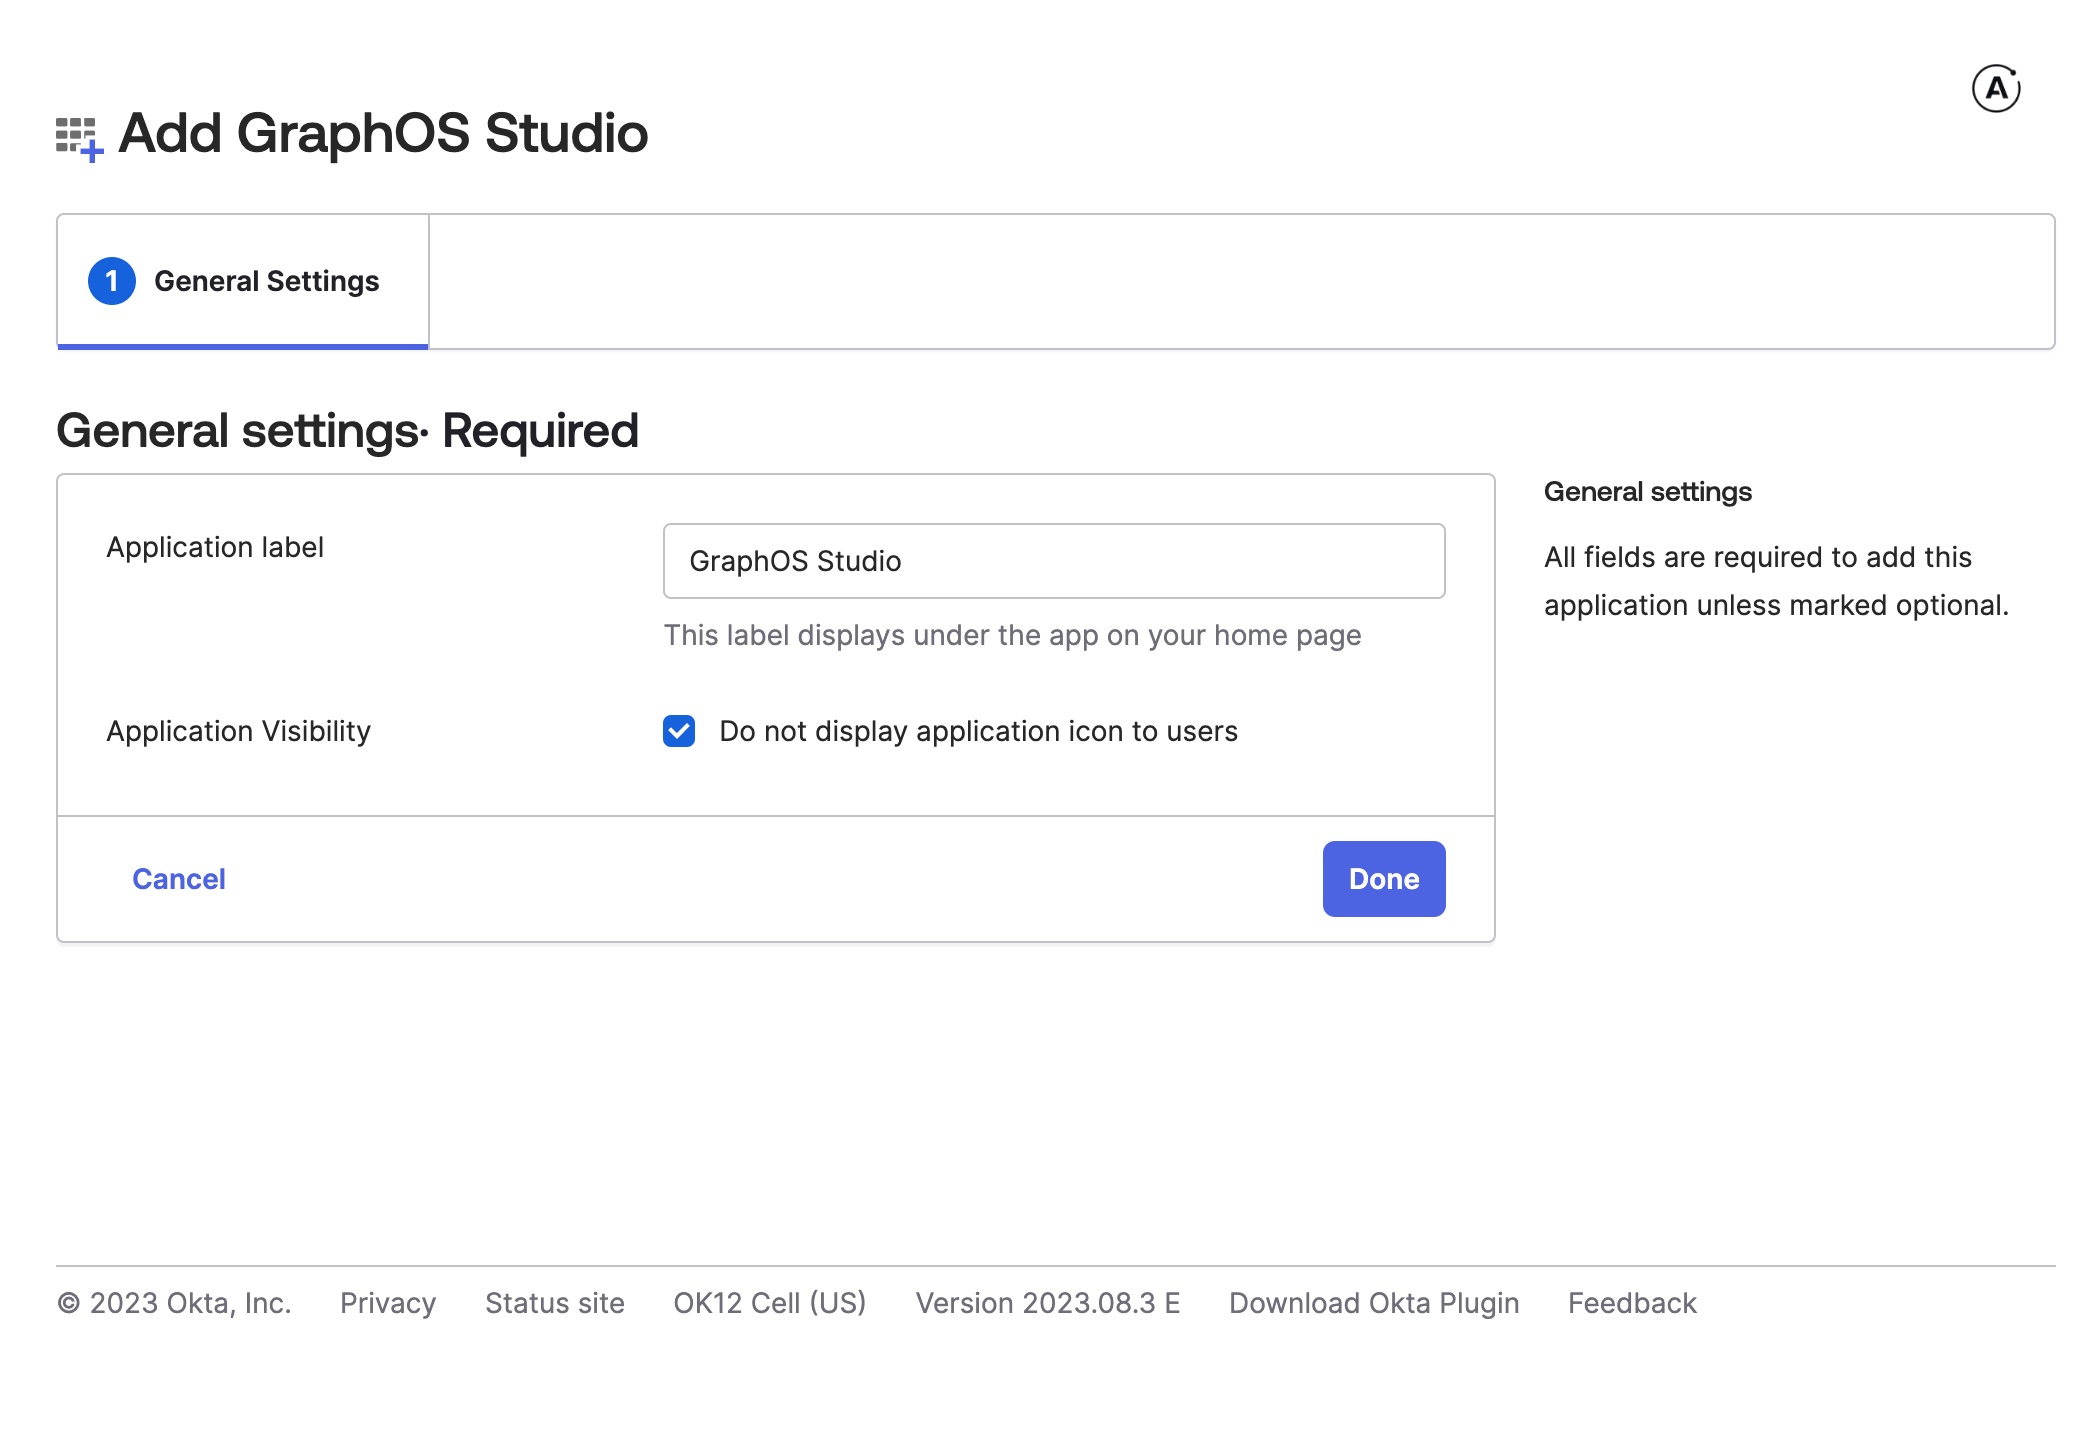
The Create SAML Integration dialog appears. In the General Settings step, provide the following values:
- App name:
Apollo GraphOS - App logo: Apollo logo (optional)
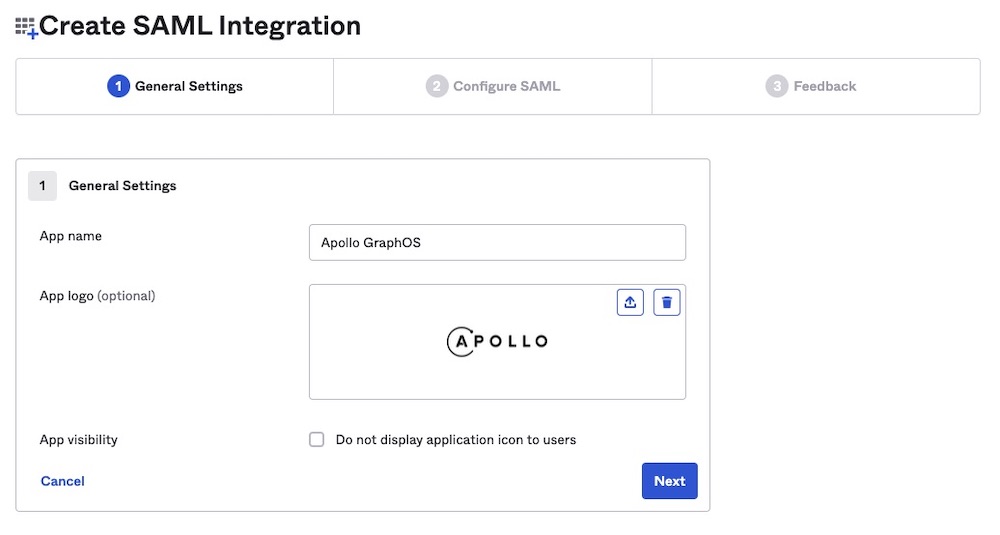
Then click Next.
- App name:
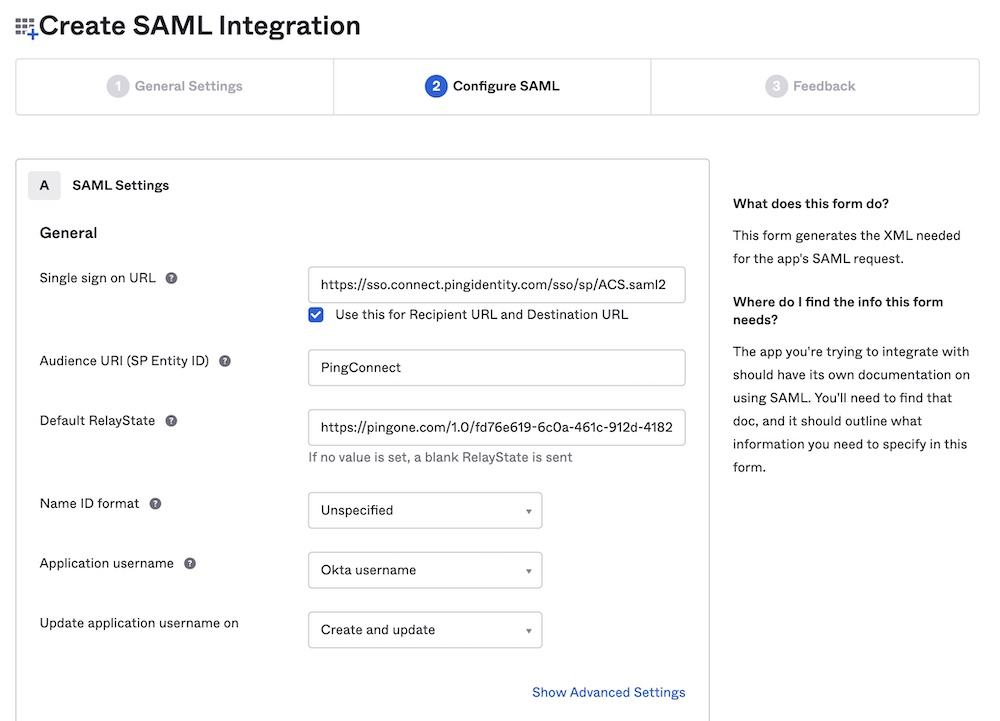
In the Configure SAML step, provide the following values:
- Single sign on URL: Single sign-on URL provided by Apollo
- Also check Use this for Recipient URL and Destination URL.
- Audience URI (SP Entity ID): Entity ID provided by Apollo
- Leave the default values for other settings, including leaving the RelayState blank.
- Single sign on URL: Single sign-on URL provided by Apollo
Still in the Configure SAML step, scroll down to Attribute Statements. Set values for the following attributes:
sub:user.email- The
subattribute should uniquely identify any particular user to GraphOS. In most cases,user.emailprovides this unique mapping.
- The
email:user.emailgiven_name:user.firstNamefamily_name:user.lastName
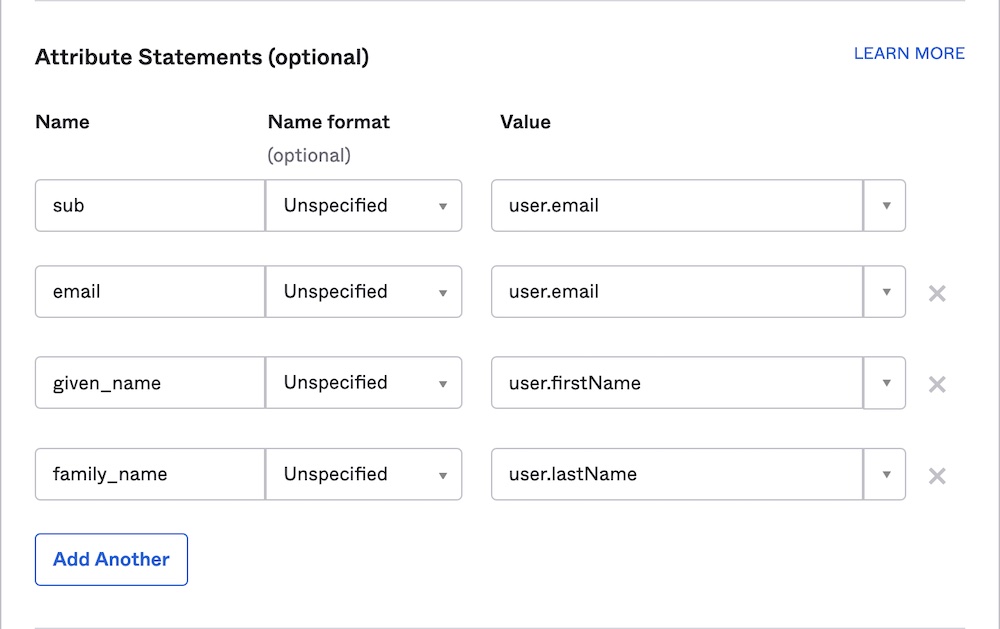
Then click Next.
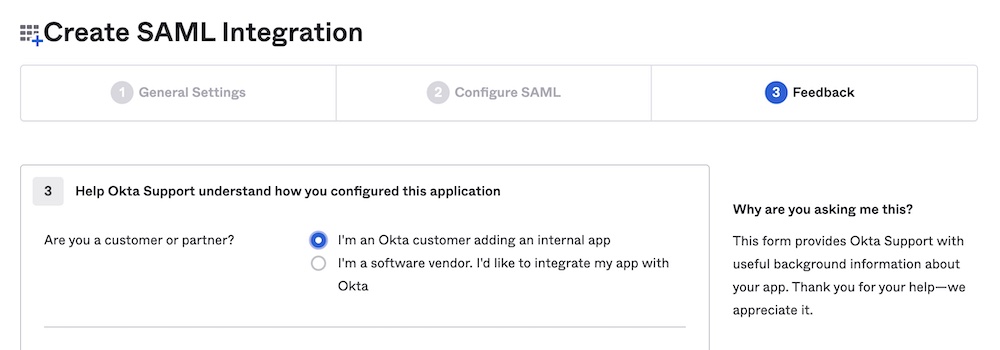
In the Feedback step, select I'm an Okta customer adding an internal app. Click Finish.
Step 2. Send SAML metadata to Apollo
In your new Okta SAML integration, go to the Sign On > Settings > SAML 2.0 > Metadata details section.
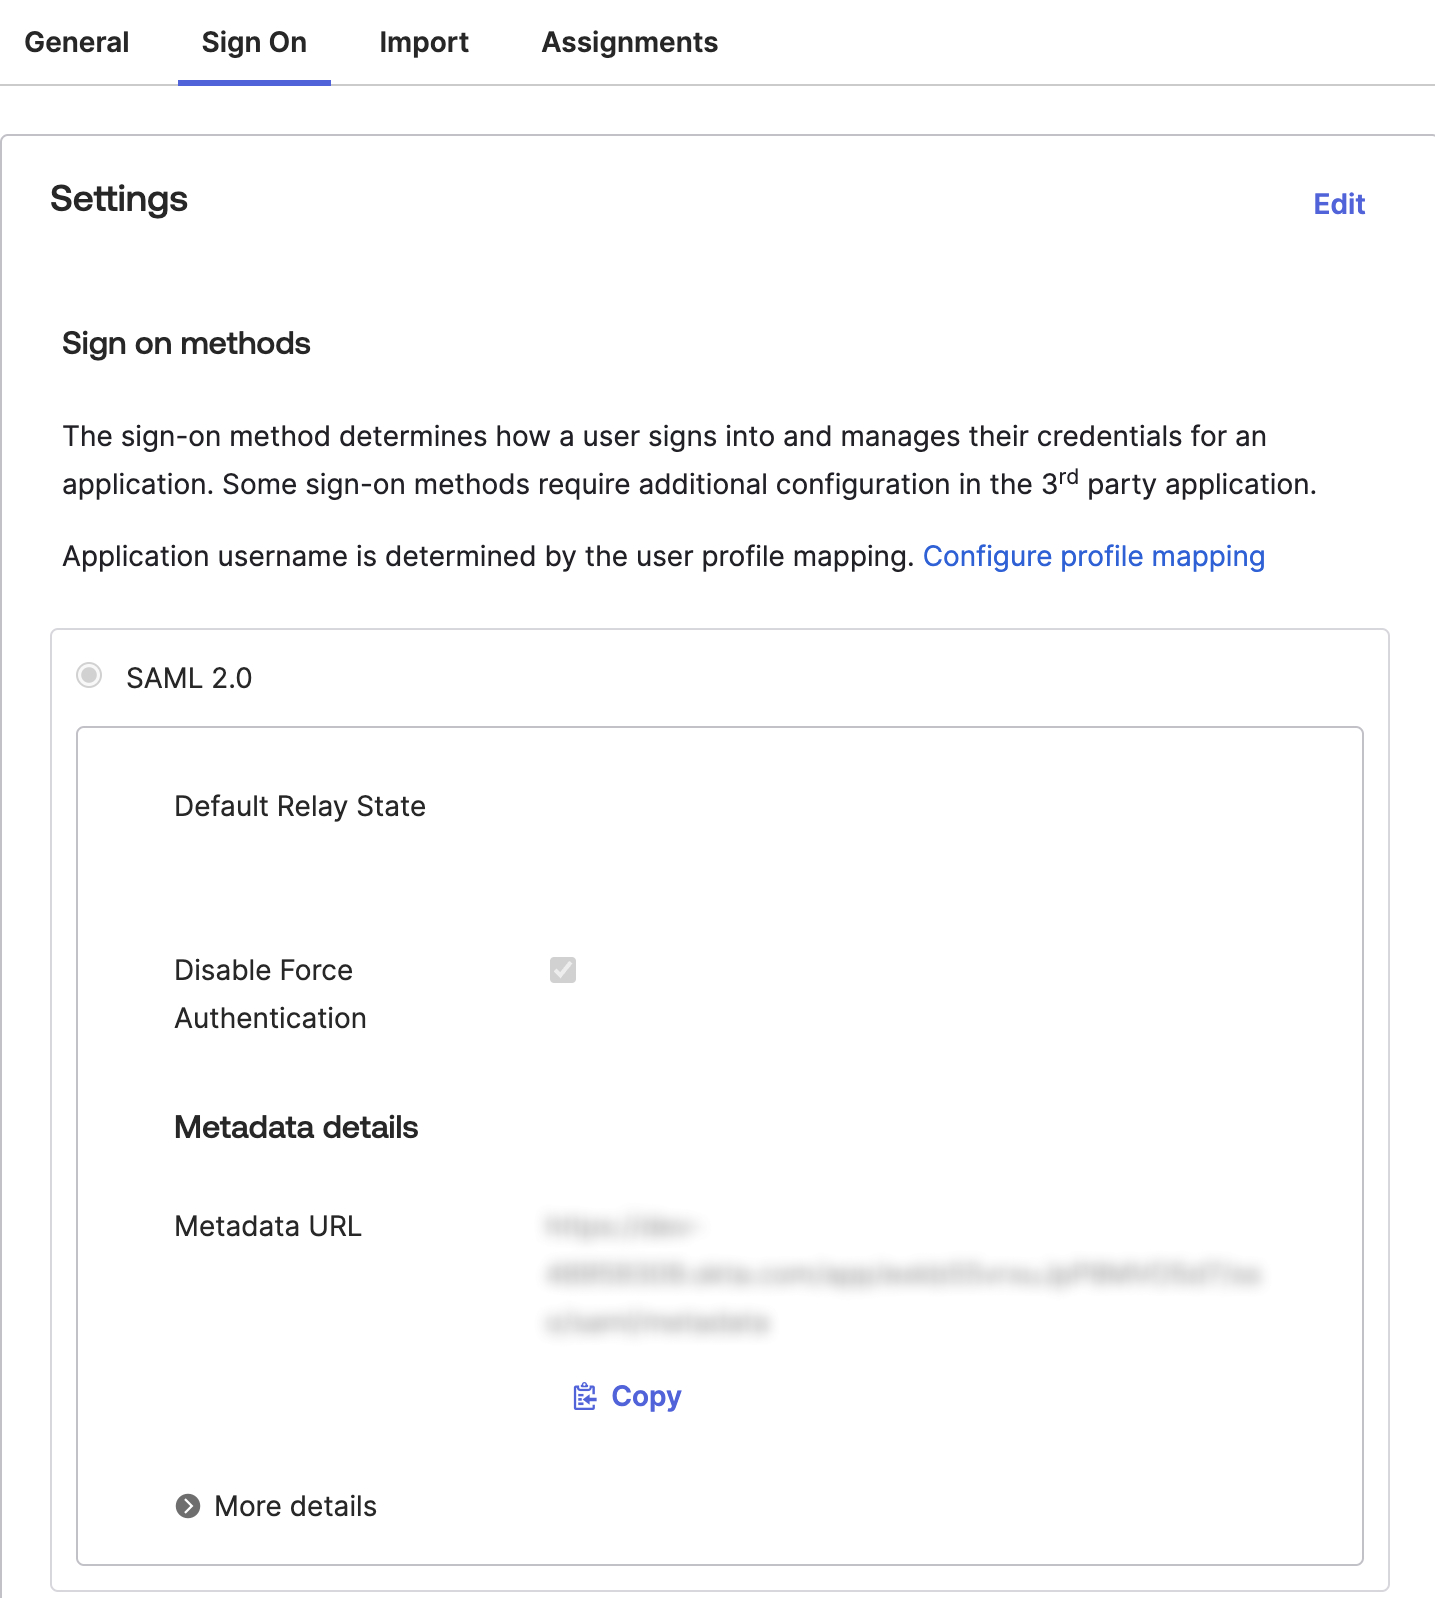
Copy and paste the contents of the Metadata URL text box into a text file.
Send the Metadata URL to your Apollo contact. They will complete your SSO setup.
Once your SSO setup is finalized, you need to assign users to your custom app in Okta.
Assign users in Okta
Once your SSO is set up, you need to assign users to it so they can access GraphOS. You can assign individual users or groups by following these steps:
From your Okta Administrator Dashboard, open the Applications view from the left menu and open the Apollo GraphOS integration. Then, click the Assignments tab.
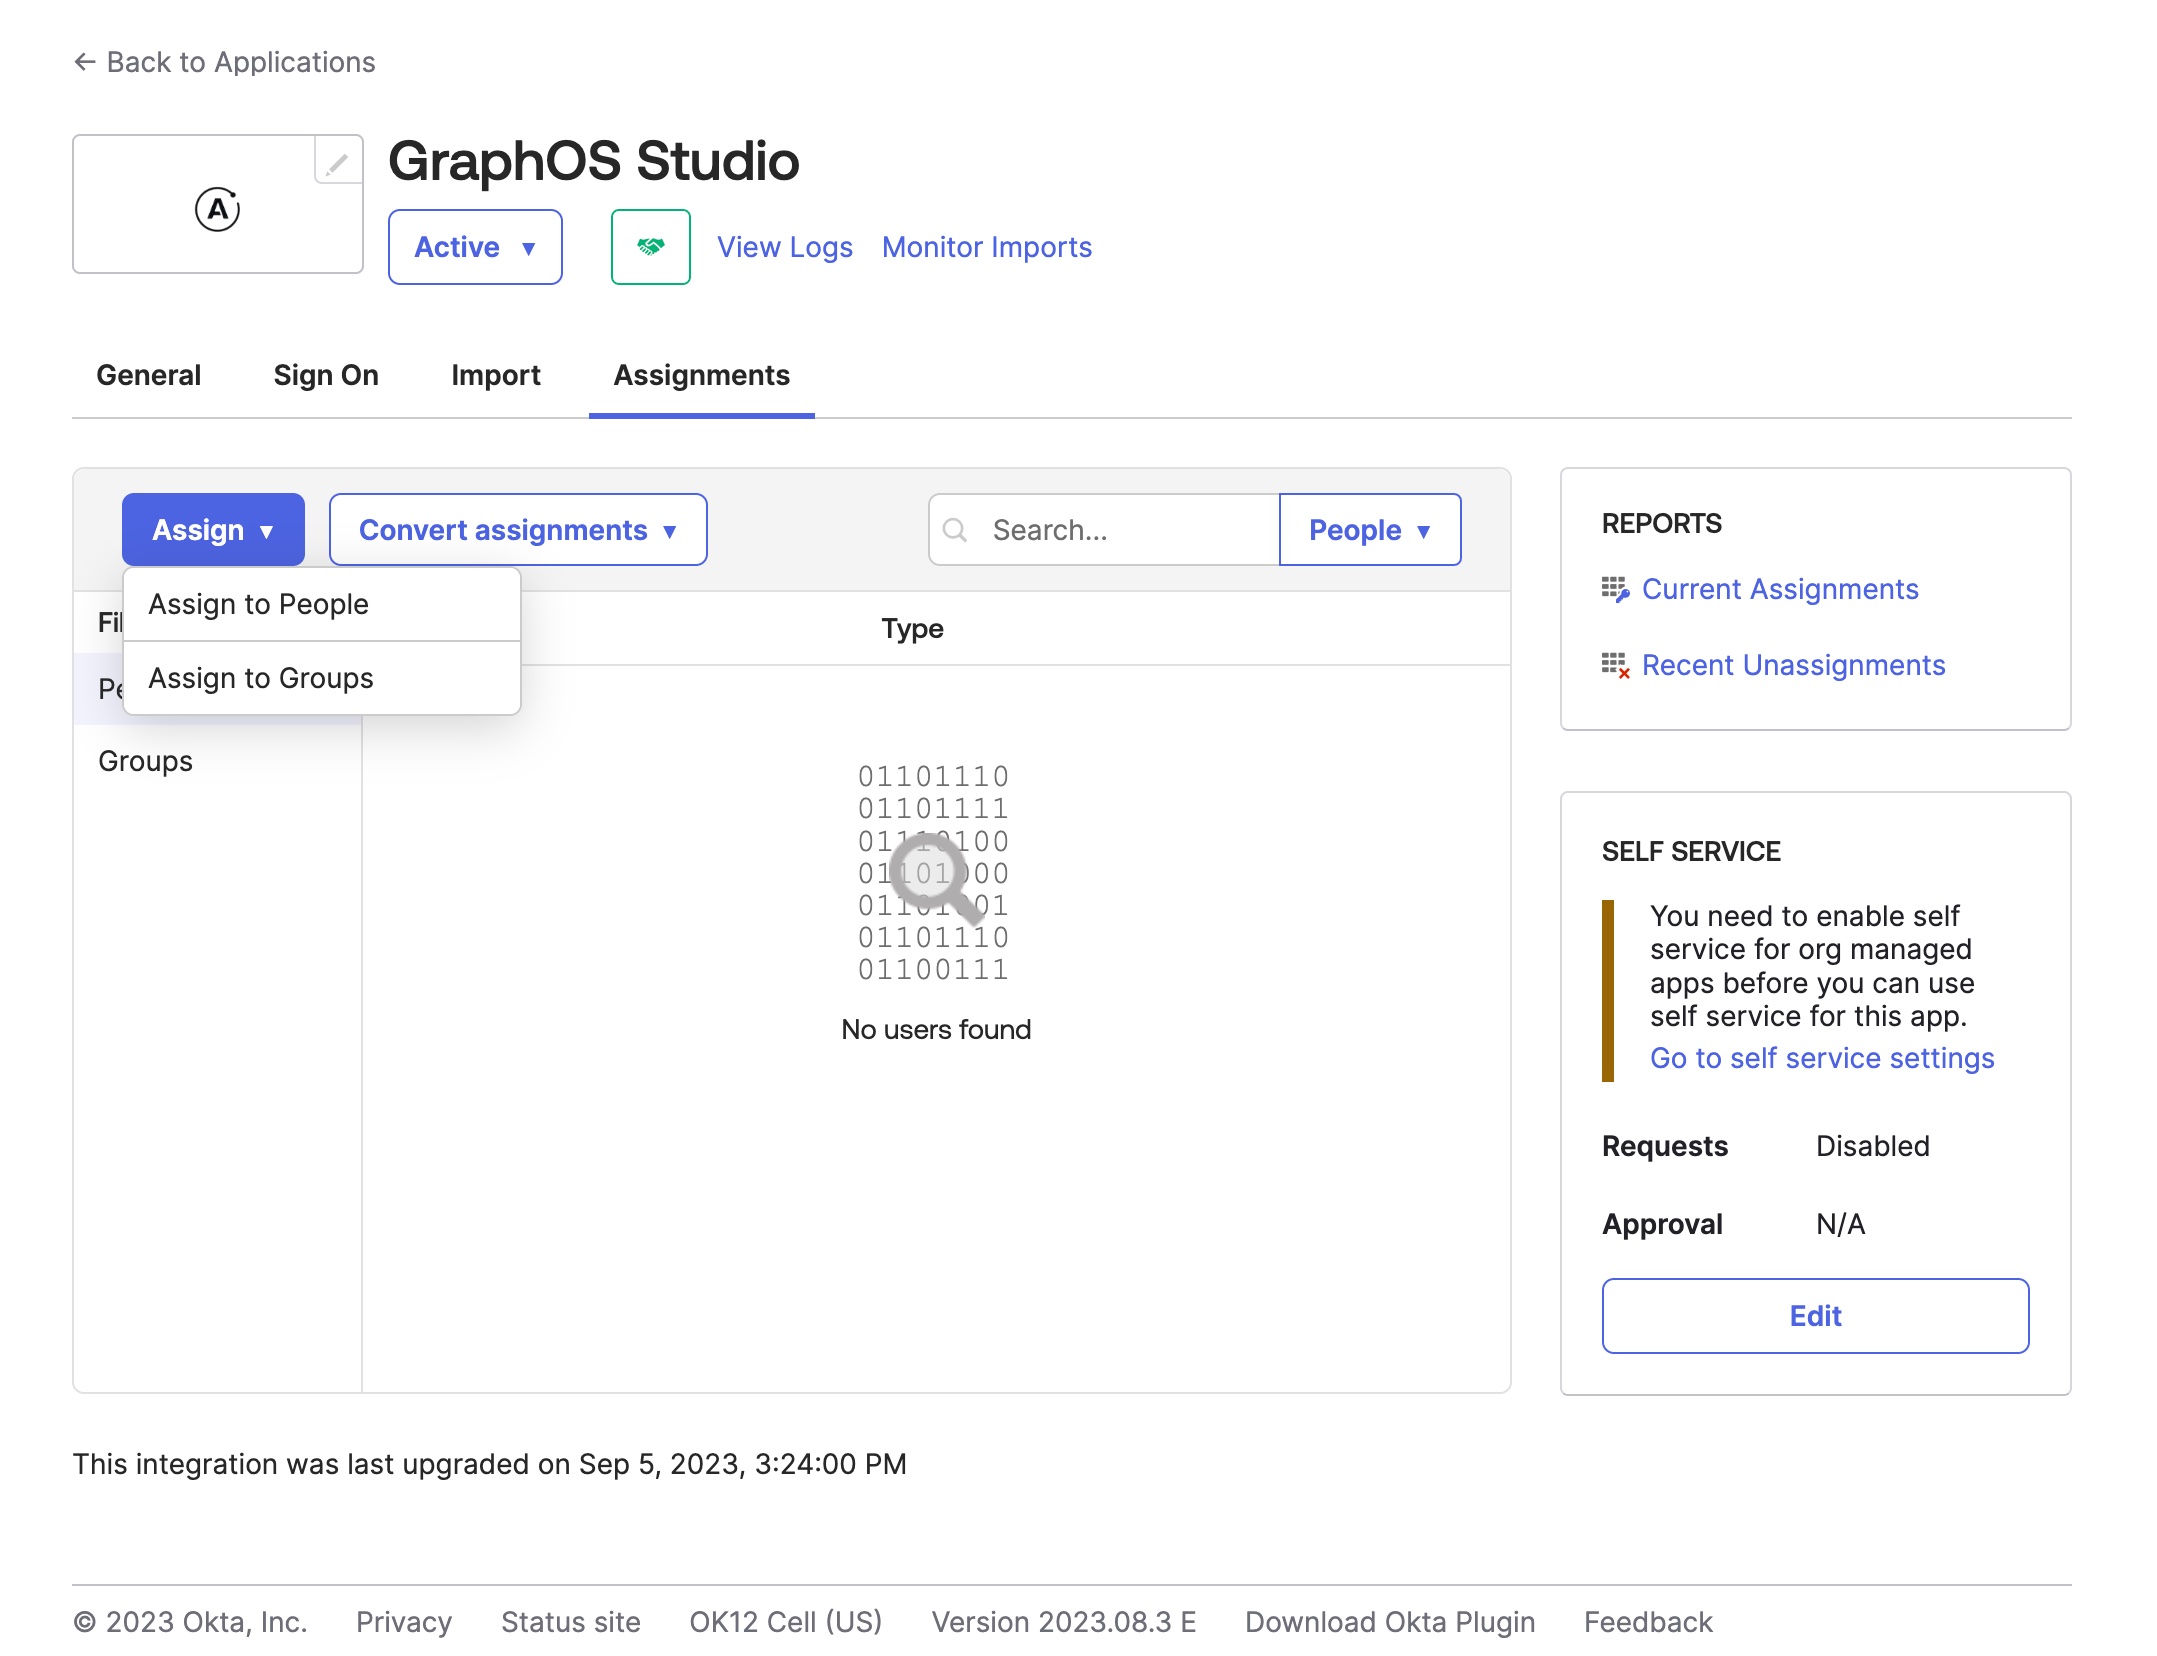
Click the Assign drop-down and then Assign to People or Assign to Groups.
Click Assign on the right of the people or group(s) you want to have access to your GraphOS Studio Org. Click Done.
Repeat these steps whenever you want to grant GraphOS Studio access to a new user or group. Okta displays every user and group you've assigned to the integration in the Assignments tab.
If team members could previously login before you implemented SSO, they must re-login to GraphOS Studio via SSO. Signing in creates a new user profile for them. Any personal API keys associated with their previous user profile will be lost. Additionally, you must reassign any GraphOS roles associated with their previous user profile.
Once you've confirmed the new configuration works as expected, remove any legacy Apollo integrations in Okta if you have them.
Legacy setup
⚠️ CAUTION
The below instructions are provided for reference only. Beginning in April 2024, Apollo recommends that all organizations use the updated instructions to create a new SSO connection.
If you previously configured SSO using the instructions below and want to use multi-organization SSO you must create a new SSO connection with the updated instructions.

